Monday, 2 March 2026

Lucky Miner LV06 Upgrade - Massive Cooling and Mounting Changes


The Lucky Miner LV06 is a 500 GH/s cheap BM1366 based SHA256 miner that is available on Aliexpress and other websites. 


For the money, it is just ok, not great. Considering you can get a Bitaxe for not much more money, the choice is abundantly clear. So how did I end up with this one? Well it was on special from Aliexpress for dirt cheap, so I had to have a go! Straight out of the box it has an OS that is based on AXE OS, the Bitaxe OS, that has been closed sourced. That absolutely has to go. Without even running with the stock OS it was straight into the mods.

So I followed instructions from Christan Workshop to install AXE OS 2.6.0 on the LV06. https://christanworkshop.com/post/779980817879482368/hacking-lucky-miner-lv06

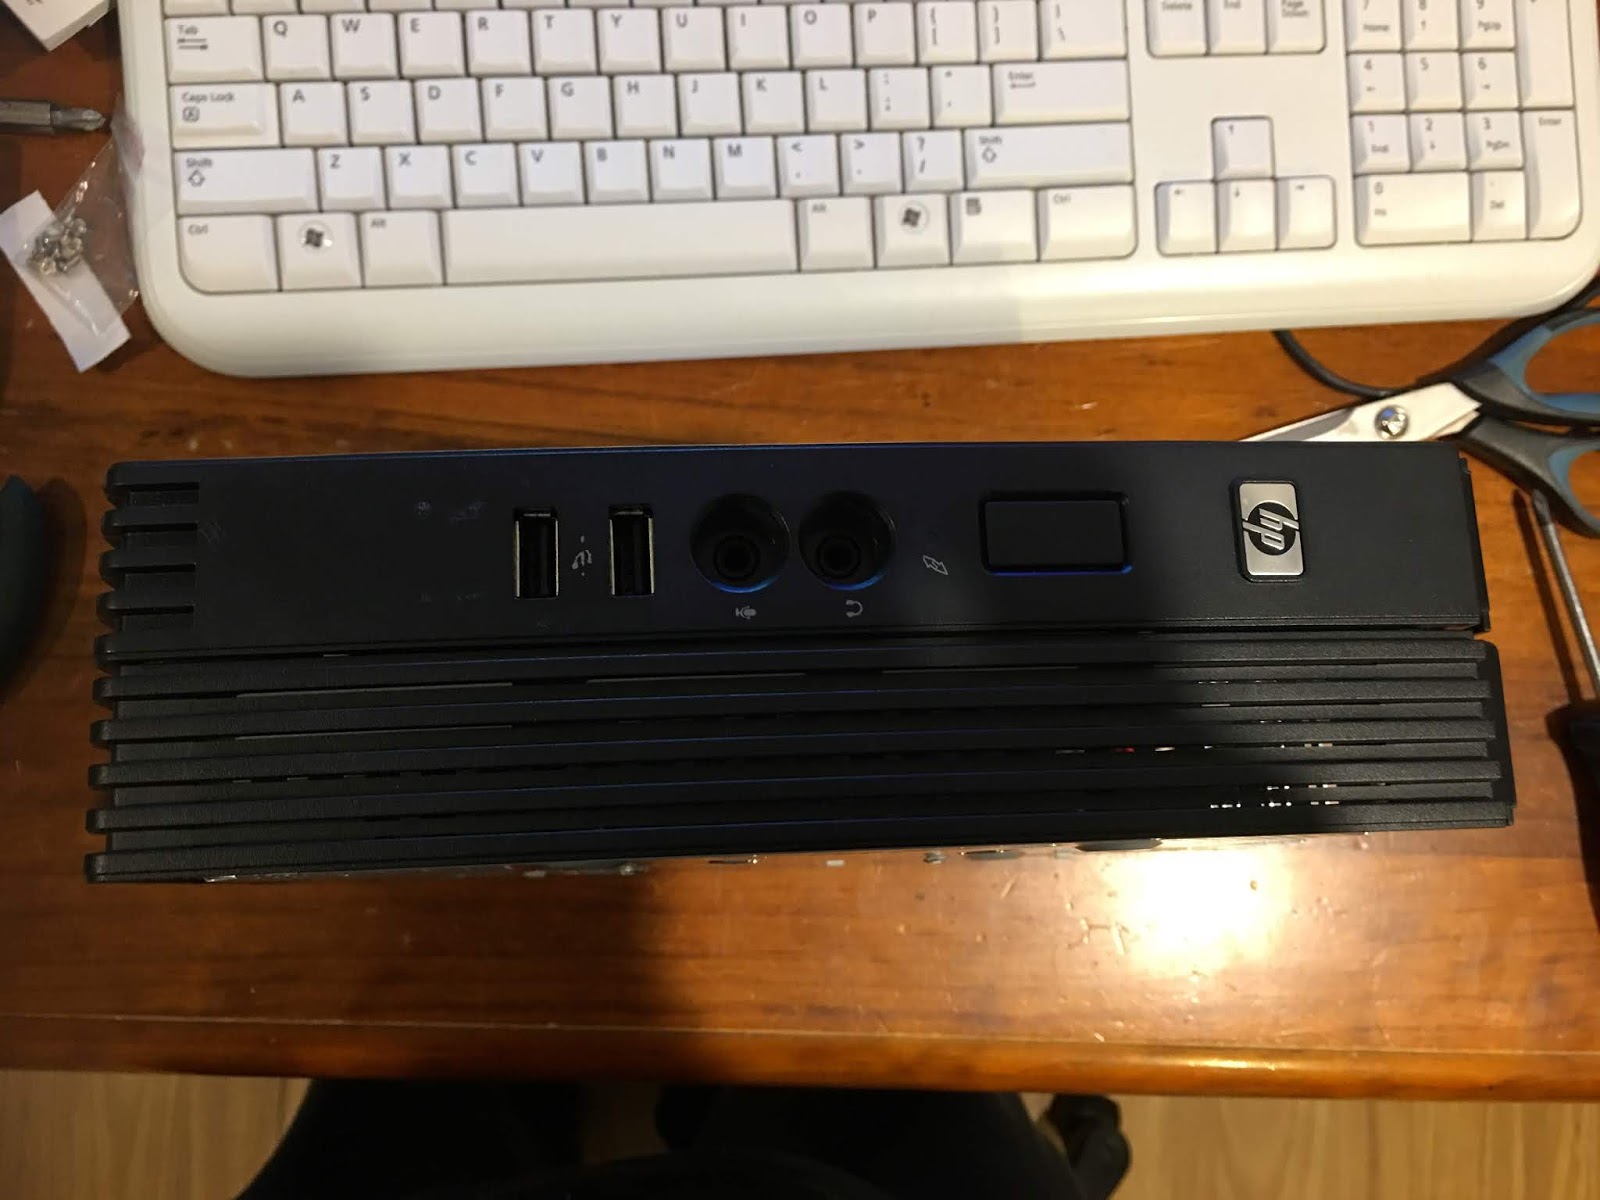
This worked out good for a few months, but I noticed that temps were settling in the 55-58C region on a 25C day, This is too high for my comfort level. It has been said that ASIC's are comfortable in that region, but the small case for the unit was physically hot. The airflow vents as shown below are just too restrictive for good cooling. And the stock fan was running at 6000 RPM and had a rather annoying high pitched whine, I could not stand that anymore.


So it was decided to take inspiration from the Bitaxe and go open frame with this one, and get those temps down. First came disassembly of the dusty LV06. Pics are below.


So with the LV06 now disassembled to board level, it was time to choose a heatsink. Aliexpress strikes again with this cheap heatsink which suits an Intel LGA2011 footprint. It has an integrated 12 volt fan which means it cannot be plugged into the LV06's 5 volt rail. For this, a USB-C to 4 pin fan converter is the solution. It steps up 5 volts to 12 volts and has a variable speed knob also. It must be powered from an external 5 volt USB source.


This heatsink is massively overrated for the task, but it was cheap and I am going to make it work. At least I will never have to worry about overheat situations again!

Next was to design a base plate in Fusion 3D. A lot had to be taken into consideration for this work, including clearances for heat and components, strengths and flexing and strength of material. This is the end result...


The 3MF file for this design should you want to use it with your slicing software lives in my Github repo here: https://github.com/matthew-au/LV06

This was printed on an Anycubic Kobra Neo 2 3D printer with regular white PLA, 50% infill 
(for strength) and supports enabled (for the heatsink tab arms). PLA is sufficient as the radiant temps from the PCB are now quite low and have cooling airflow. You could print in ABS or PETG if you want greater heat ratings.

Now, to construction. You can reuse all the original screws except the OLED display ones. Use IPA alcohol and a wipe to clean the old heatsink compound off the ASIC and the board firstly.


Start with the main PCB and screw down. Then move onto the OLED. Put a really good blob of heatsink paste on the ASIC. I'm a fan of too much is good, not enough is just crazy. 


Now fit the heatsink, remembering to pull off the safety label first or risk instant ASIC burnout. Plug in your fan controller and OLED and it should look like this.


All finished and plugged in, it should look like this:


Logging into AXE OS, I immediately noticed that with the fan control on the three quarter setting, the idling temp was 36C, down from 58C with the stock heatsink and fan.


These are the power specs. I am running stock frequency and ASIC voltage, as overclocking seems to do little but heat up the standard power brick to an unacceptable level. The power brick runs warm with stock settings, so you would definitely need an uprated PSU for overclocking.


The hash rate sitting at a nice 490 GH/s at 36C. Can't ask for much more than that. 


Lastly, it was time for a reflash and upgrade. Un-painted has the latest version of AXE OS for the LV06 and LV07 (compatible with both). You can find it here https://github.com/un-painted-org/ESP-Miner/releases/tag/v2.7.1-LV07 

After the upgrade, a much nicer GUI and slightly more stable performance. But much of the same.

So what I ended up with was something vaguely resembling a Bitaxe lying flat, with a huge heatsink, massively overcooled, 500GH/s and quiet as anything. The stock LV06 fan really was annoyingly loud, and had no PWM speed control either. The new fan is whisper quiet.

As mentioned, overclocking the LV06 does practically nothing except heat up the power supply brick so it is red hot. No overclock = warm brick. No appreciable increases in hashing speed were seen when overclocking over a period of days, it always settled down to about 450-490 GH/s.

Use at your own risk! I take no responsibility and this is for educational purposes only. 

Happy mining!

Sunday, 11 August 2019

HP T5740 Thin Client to SSD Fat Client Linux Conversion

Converting a thin client to run Ubuntu Linux


This article is about my project of taking a HP T5740 thin client with a 2GB IDE DOM flash and 2GB ram, and converting it into a stand alone Linux computer with an optional HP expansion case, Wi-Fi and SSD drive.

The project starts with a T5740 thin client purchased off eBay, the unit came with a power supply and was fitted with 2GB ram and a 2GB IDE DOM module. The expansion case was purchased from Amazon.

The reason I wanted to convert this unit was to use it as an NVR (Network Video Recorder) for my front door camera. It had to be fanless and silent, and excellent on power. The T5740 features an Intel Atom N280 1.6GHz 32 Bit processor and is capable of Wi-Fi when fitted. It also features an on-board SATA drive port, though only supplying 5V which makes a SSD the perfect choice.

A 500GB Western Digital WD Blue SSD was fitted to allow ample video storage


So here goes:


Firstly, before I commenced, I ensured the BIOS was up to date from the HP website, which is important for Ubuntu to go on smoothly.

I removed the screws and took off the top USB compartment cover, and both side covers.


On the back, remove the metal ram cover. The ram slot on a standard unit may or may not be empty. I fitted a 2GB Luosilk PC-10600 so-dimm module to this slot. Reinstall the ram cover.


On the inside, remove the IDE DOM by pulling it upwards and out, using pliers to release the board clip.

The first new item I fitted was the Broadcom Wi-Fi / Bluetooth combo card. This slides into the Mini PCI-e slot and clicks down.


I installed the Wi-Fi antenna fly lead into the back of the chassis. It is a RP-SMA connection and pokes through the chassis and has a nut that does up on the other side. It plugs into the Wi-Fi card into the MAIN socket.


Now I installed a further 2GB of ram, giving the system 4GB in total. This is as much as a 32 bit processor core will directly access.


Next is the SSD connection, and this plugs into the on-board SATA port. A right-angle SATA connector was needed. In this case, the right hand side of the adaptor required trimming with a knife so it would clear the black expansion port (which is not being used so clearance is a non issue).


Plugging in a SATA extension lead to the right angle adaptor was next. This is needed to run through to the expansion case.


Ok, now the expansion case was ready to be prepared. As standard, there is a PCI card, fan and serial ports included. None of this is being used in my case so it was all removed.


The SSD was mounted in the expansion case using a 2.5” to 3.5” dual slot adapter, which is pop riveted to the expansion case. This needs the removal of a couple of mounting lugs (which were removed with pliers). As you can see the drive tray fits nicely.


The SSD was screwed in ready for cabling.


Back to the main unit, I fed the SATA cable through the original outer panel. Once done, the panel screws back down.


The SATA cable was then attached to the SSD and folded in nicely to the expansion case ready for assembly.


The expansion case has built in captive screws, so you just bring the original case and expansion case together and screw down.


All outer skin panels were reassembled and the new double top USB cover that comes with the expansion case fitted.


No leftover parts (YAY!)

Next was OS installation.

My OS install consisted of installing Xubuntu 18.04 LTS 32 Bit edition. This was installed from a bootable USB drive.

The install took about 20 minutes and went smoothly with no errors, and recognised all hardware.

I was sure to tick the box “Download all third party drivers and software” which meant that the Wi-Fi card worked first time.

The now fat client was set-up with ZoneMinder NVR package for Linux. This will be covered in another article.

The unit performs well for its specification and is totally silent with the SSD, and gives off next to no heat even at 100% load testing.